Our meal generally ends with yogurt rice. Regularly, it would be rice mixed with yogurt and a little salt. On special occasions, we spice it up up by adding tempered mustard seeds, cumin seeds, ginger, green chillies, curry leaves and an assortment of fruits/ veggies like grapes, pomegranates, raisins, carrot, cucumber, cilantro, raw mango etc. Yes!! it is a savory dish - and made with yogurt. It feels heavenly to eat a bowl of yogurt rice on a warm summer afternoon... There is nothing more soothing than this!!!
It is a simple and easy preparation and is traditional to south India. Every home/ restaurant in Tamil Nadu (India) serves this for lunch.
Ingredients:
Rice - 1 cup
Yogurt - 1 cup
Milk - very little as required
Pomegranate arils - 3/4 cup
Cilantro - 1 tbsp, finely chopped
Salt to taste
For tempering:
Mustard seeds - 1/2 tsp
Urad dal - 1 tsp
Green chilies - 3 slit in the center
Ginger - 1/4 tsp, finely chopped or minced
Curry leaves - 1 stem (leaves loosened)
Hing - 1/8 tsp
For grinding (this step is optional):
Cumin - 1/4 tsp
Grated coconut - 2 tbsp
Method:
Cook the 1 cup of rice with 2 1/2 - 3 cups of water. This would make it a little soggy, and that is exactly what we need (I use my rice cooker). When the rice is still warm, mash it with a ladle. Grind cumin and grated coconut with little water into a smooth paste. Add this paste and yogurt to the rice and mix well. If the mixture seems very thick, add milk until it reaches desired consistency.
Heat little oil in a pan. When hot, add mustard seeds and they will start spluttering. Use a splutter screen to avoid a mess. When the spluttering stops, add the other 'tempering' ingredients. When urad dal turns golden drown, add the tempering to yogurt rice. Now add pomegranates and cilantro and mix well. Cool in the refrigerator, if required. Yummy yummy yogurt rice is ready to be enjoyed!!
This was our main course-2 during the POM dinner party I recently hosted. Check out the recap here.
Dedicated to my passion - food. I love to cook, eat, sample - anything and everything to do with food :)
Showing posts with label recipe. Show all posts
Sunday, November 21, 2010
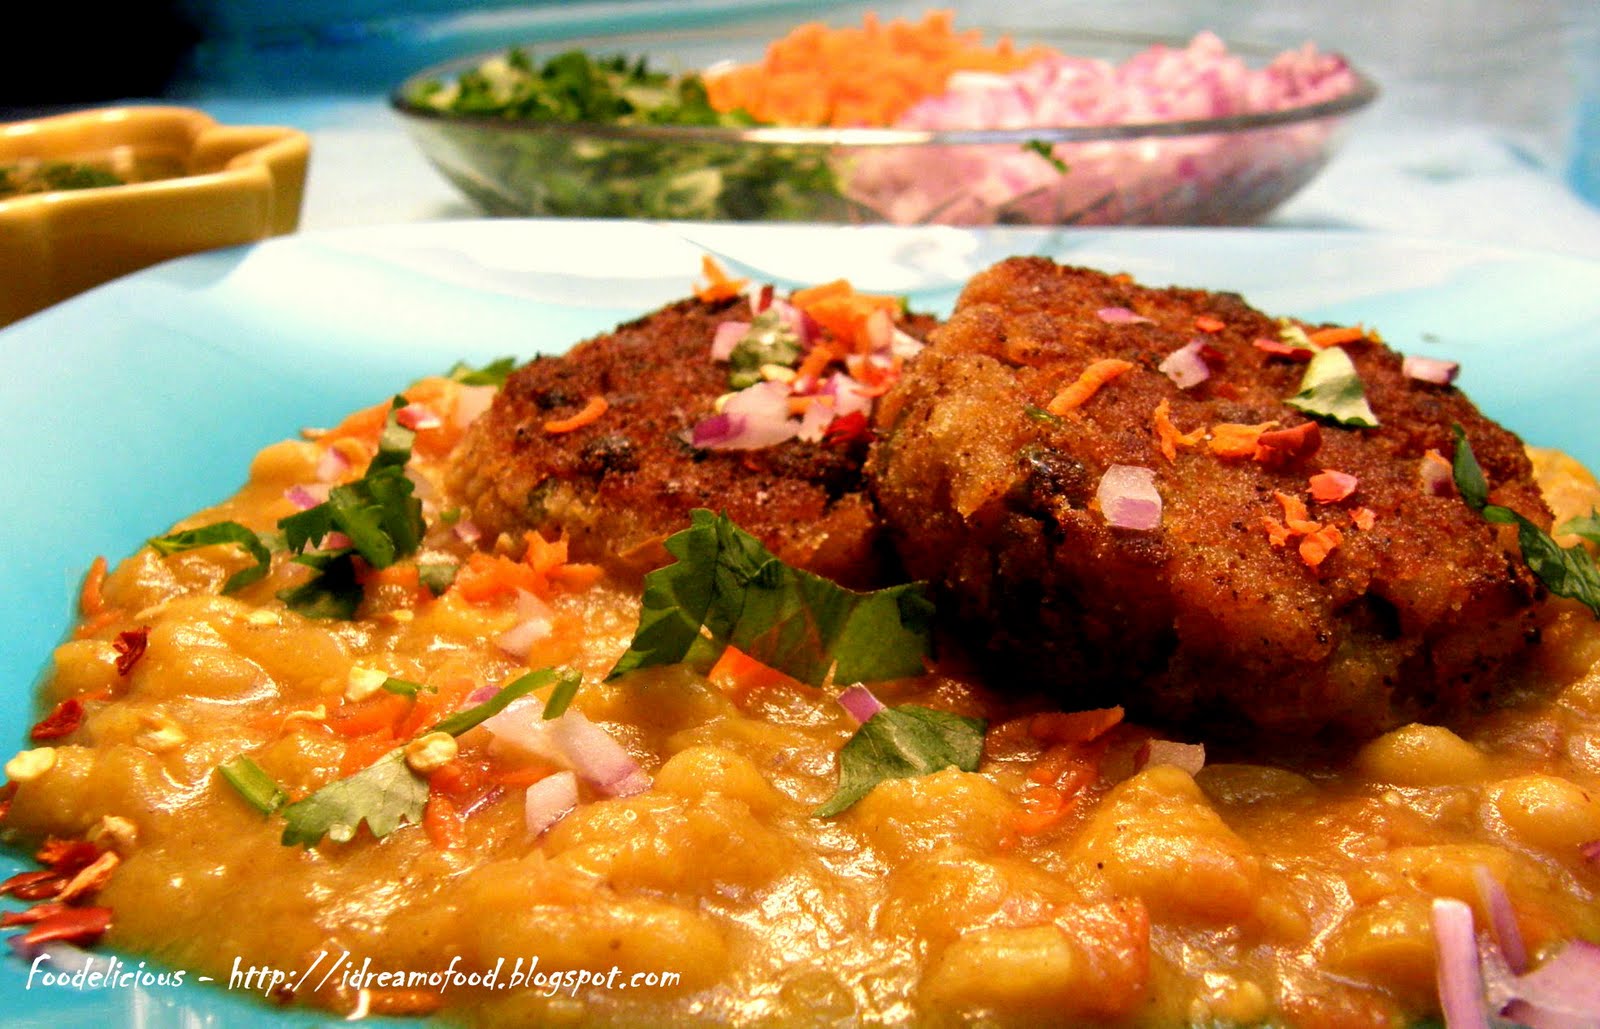
Oatmeal crusted veggie masala cutlets with Anardana
I have always been around great cooks - first my mom and then my husband. My mom cooks with fixed recipes, (of course, she knows her recipes like the back of her hand) making her very consistent. My husband on the other hand is a big time experimenter... He cooks without recipes and throws in whatever he thinks would work well together. Even the same dishes never taste the same, twice. They turn out good most of the time... But there are times when things go wrong.... very wrong!!
I draw my inspiration from both of them - the result? tada - these cutlets / patties. My mom's cutlets are very popular among my friends. She learnt to prepare them from my aunt and I learnt it from her. She deep fries the cutlets, so they are crispy and yummy. I pan fried mine to reduce the oil usage. Crusting with oatmeal is something I see a lot in 'Chopped' (My fav foodie reality show) on Food Network. When chefs find oatmeal in their mystery basket, they use it in crusting!!! I experimented (safely), and it was a success!!
This recipe is similar to my Ragada patties. Cutlets contain mainly potatoes, which is just startch. I like to add some form of proteins and vegetables to them, so that they are not only comforting, but healthy too.
I have never been a big fan of soy nuggets... They have always tasted bland to me. Recently, I tried the soy granules and fell in love with them. Unlike nuggets, these are small pieces of soy and absorb flavors well and does not have a very meaty texture either.
Ingredients:
Potatoes - 5 medium sized, steamed, peeled and mashed
Peas - 3/4 cup
Onion - 1 large finely chopped
Ginger paste - 1 tsp
Garlic paste - 2 tsp
Soy granules (uncooked) - 1 cup
Bay leaves - 2
Cinnamon - 1 inch piece
Red chili powder - 1 tsp (or to taste)
Garam masala - 1/2 tsp
Turmeric powder - 1/2 tsp
Anardana (Dried and ground pomegranate seeds) - 1/2 tsp
Oatmeal - 2 cups
salt and pepper to taste
Method:
Cook soy granules as per directions in the box.
Mix salt, turmeric powder and 1/2 tsp of chili powder with the mashed potatoes and set aside.
Heat oil in a skillet, add bay leaves and cinnamon. When they turn brown, add onion and fry until transparent. You can add a little salt at this time and let the onions sweat out. Add ginger paste and garlic paste and fry until the raw smell disappears. Add peas and stir for a minute or two. Add the remaining chili powder, garam masala, anardana, prepared soy granules and potato mixture and mix thoroughly. This might take some effort as the mixture is thick and sticky. When combined well, remove from heat and let it cool.
Grind oatmeal in the food processor. Season with salt and pepper.
Remove the cinnamon stick and bay leaves from the potato mixture. Form the mixture into patties and crust with the oatmeal flour. In a hot skillet with little oil pan fry the cutlets until golden brown on both sides. Remove onto a paper towel and enjoy warm.
Variation: Since, there is no binding agent, the oatmeal just dusts the cutlet and does not give a thick crust. if you want one, you can dip the cutlets into buttermilk or egg whites or a thin paste of all purpose flour and water (like my mom does), before crusting with oatmeal. In this case, you need to deep fry the cutlets and the result is crispy on the outside and soft and delectable on the inside. May be, baking/ broiling would work too... - worth experimenting...
I served these cutlets with Pomegranate chutney and POMyo! sauce. This was our main course-1 during the POM dinner party I recently hosted and it was a huge hit. Check out the recap here.
I draw my inspiration from both of them - the result? tada - these cutlets / patties. My mom's cutlets are very popular among my friends. She learnt to prepare them from my aunt and I learnt it from her. She deep fries the cutlets, so they are crispy and yummy. I pan fried mine to reduce the oil usage. Crusting with oatmeal is something I see a lot in 'Chopped' (My fav foodie reality show) on Food Network. When chefs find oatmeal in their mystery basket, they use it in crusting!!! I experimented (safely), and it was a success!!
This recipe is similar to my Ragada patties. Cutlets contain mainly potatoes, which is just startch. I like to add some form of proteins and vegetables to them, so that they are not only comforting, but healthy too.
I have never been a big fan of soy nuggets... They have always tasted bland to me. Recently, I tried the soy granules and fell in love with them. Unlike nuggets, these are small pieces of soy and absorb flavors well and does not have a very meaty texture either.
Ingredients:
Potatoes - 5 medium sized, steamed, peeled and mashed
Peas - 3/4 cup
Onion - 1 large finely chopped
Ginger paste - 1 tsp
Garlic paste - 2 tsp
Soy granules (uncooked) - 1 cup
Bay leaves - 2
Cinnamon - 1 inch piece
Red chili powder - 1 tsp (or to taste)
Garam masala - 1/2 tsp
Turmeric powder - 1/2 tsp
Anardana (Dried and ground pomegranate seeds) - 1/2 tsp
Oatmeal - 2 cups
salt and pepper to taste
Method:
Cook soy granules as per directions in the box.
Mix salt, turmeric powder and 1/2 tsp of chili powder with the mashed potatoes and set aside.
Heat oil in a skillet, add bay leaves and cinnamon. When they turn brown, add onion and fry until transparent. You can add a little salt at this time and let the onions sweat out. Add ginger paste and garlic paste and fry until the raw smell disappears. Add peas and stir for a minute or two. Add the remaining chili powder, garam masala, anardana, prepared soy granules and potato mixture and mix thoroughly. This might take some effort as the mixture is thick and sticky. When combined well, remove from heat and let it cool.
Grind oatmeal in the food processor. Season with salt and pepper.
Remove the cinnamon stick and bay leaves from the potato mixture. Form the mixture into patties and crust with the oatmeal flour. In a hot skillet with little oil pan fry the cutlets until golden brown on both sides. Remove onto a paper towel and enjoy warm.
Variation: Since, there is no binding agent, the oatmeal just dusts the cutlet and does not give a thick crust. if you want one, you can dip the cutlets into buttermilk or egg whites or a thin paste of all purpose flour and water (like my mom does), before crusting with oatmeal. In this case, you need to deep fry the cutlets and the result is crispy on the outside and soft and delectable on the inside. May be, baking/ broiling would work too... - worth experimenting...
I served these cutlets with Pomegranate chutney and POMyo! sauce. This was our main course-1 during the POM dinner party I recently hosted and it was a huge hit. Check out the recap here.
Labels:
cooking,
cutlet,
patties,
POM dinner party,
potato,
recipe,
soy granules
POMyo! sauce (Pomegranate Yogurt sauce)
I wanted to make a second dipping sauce for my POM dinner party and was racking my brain for ideas... If pomegranates would taste good with milk (milk shakes), and it is not uncommon to use them in yogurt rice - I decided to make a sauce with yogurt base. I also used some spicy mustard to give a zing to it.
Ingredients:
Juice from 2 large POM wonderful Pomegranates about (250 ml)
yogurt - 2 1/2 tbsp
spicy mustard - 1/4 - 1/2 tsp (as per taste)
salt to taste
Method:
Juice arils from 2 large pomegranates. I used my blender to blend the arils and then filtered through a sieve. You can use a citrus juicer or simply use POM wonderful 100% Pomegranate juice.
Heat the juice over medium heat. When it comes to a rolling boil, add salt to taste and simmer until it reduces into a saucy consistency and coats the spoon.Remove from heat and cool to room temperature. Add yogurt, spicy mustard and more salt if required and whisk together until smooth. Garnish with pomegranate arils.
This sauce is great for dipping chips and veggies too. Read about my POM dinner party recap here.
Those red and green beauties out there in these pictures are called silk chilies (for their silky sweetness, I guess). I found them at my local farmers market and instantly fell in love with them. While photographing the sauce, I just could not resist myself from focusing on them, so here we go!!!
Ingredients:
Juice from 2 large POM wonderful Pomegranates about (250 ml)
yogurt - 2 1/2 tbsp
spicy mustard - 1/4 - 1/2 tsp (as per taste)
salt to taste
Method:
Juice arils from 2 large pomegranates. I used my blender to blend the arils and then filtered through a sieve. You can use a citrus juicer or simply use POM wonderful 100% Pomegranate juice.
Heat the juice over medium heat. When it comes to a rolling boil, add salt to taste and simmer until it reduces into a saucy consistency and coats the spoon.Remove from heat and cool to room temperature. Add yogurt, spicy mustard and more salt if required and whisk together until smooth. Garnish with pomegranate arils.
This sauce is great for dipping chips and veggies too. Read about my POM dinner party recap here.
Those red and green beauties out there in these pictures are called silk chilies (for their silky sweetness, I guess). I found them at my local farmers market and instantly fell in love with them. While photographing the sauce, I just could not resist myself from focusing on them, so here we go!!!
Labels:
cooking,
dipping sauce,
POM dinner party,
Pomegranate,
recipe,
sauce,
yogurt
Pomegranate chutney
When I decided to make a dipping sauce out of pomegranate for my POM dinner party that would be versatile enough for dipping and using in Bhel puri, this is what I came up with. I drew my inspiration from tomato ketchup and Indian Tamarind-Date sweet sauce. Since pomegranate has a wonderful sweet tart flavor, it can elegantly replace tomato or tamarind in a sauce. I served it as a condiment with the veggie masala cutlet and in Bhel puri instead of sweet sauce.
Ingredients:
Juice from 4 large POM Wonderful pomegranates (about 500 ml)
Dates - 8 to 10 pitted and soaked in just enough hot water for 4 hours
Cumin powder - 1/2 tsp
Coriander powder - 1/2 tsp
Chili powder - 1/4 tsp (or to taste)
Garlic - 3 large cloves, peeled
Ginger - 1 inch piece
salt to taste.
Method:
Juice arils from 4 large pomegranates. I used my blender to blend the arils and then filtered through a sieve. You can use a citrus juicer or simply use POM wonderful 100% Pomegranate juice.
Grind the soaked dates into a smooth paste.
Heat the juice over medium heat. Drop whole garlic cloves and the peeled ginger piece into the juice. When it comes to a rolling boil, add cumin powder, coriander powder, chili powder and salt to taste and simmer until it reduces into a saucy consistency and coats the spoon. Remove the garlic cloves and ginger piece from the sauce using a slotted spoon.
Now, add dates paste, simmer for 2-3 more minutes and remove from heat. The chutney thickens more while cooling.
My guests loved this sauce and were asking me for recipe. Read the POM dinner party recap here.
Ingredients:
Juice from 4 large POM Wonderful pomegranates (about 500 ml)
Dates - 8 to 10 pitted and soaked in just enough hot water for 4 hours
Cumin powder - 1/2 tsp
Coriander powder - 1/2 tsp
Chili powder - 1/4 tsp (or to taste)
Garlic - 3 large cloves, peeled
Ginger - 1 inch piece
salt to taste.
Method:
Juice arils from 4 large pomegranates. I used my blender to blend the arils and then filtered through a sieve. You can use a citrus juicer or simply use POM wonderful 100% Pomegranate juice.
Grind the soaked dates into a smooth paste.
Heat the juice over medium heat. Drop whole garlic cloves and the peeled ginger piece into the juice. When it comes to a rolling boil, add cumin powder, coriander powder, chili powder and salt to taste and simmer until it reduces into a saucy consistency and coats the spoon. Remove the garlic cloves and ginger piece from the sauce using a slotted spoon.
Now, add dates paste, simmer for 2-3 more minutes and remove from heat. The chutney thickens more while cooling.
My guests loved this sauce and were asking me for recipe. Read the POM dinner party recap here.
Labels:
chutney,
cooking,
ketchup,
POM dinner party,
Pomegranate,
recipe,
sauce
Couscous - Pomegranate and much more salad
I prepare couscous salad pretty often, with small variations every time. Now, it is time to incorporate the wonderful fall fruit, pomegranate.
Couscous is quite a newcomer to my kitchen. About a year ago, I saw Sandra Lee from the Food Network, using it. I searched online and found that couscous is a type of Middle Eastern pasta made from semolina flour. Traditionally, it is cooked by steaming for a long time. Today, the varieties sold in the grocery stores are pre-steamed for convenience and are ready in 10 minutes. Even though, it is a pasta, it neither looks nor tastes like one, but more like cracked wheat. It is very versatile and is an interesting alternative to regular pasta. I have always been using Trader Joe's whole wheat couscous in my preparations.
This is an adaptation from couscous salad recipe posted in about.com
Ingredients:
Dry Couscous - 1 cup
Black beans - 1 16 oz can, drained
Pomegranate - 1 cup
Red bell pepper - 1 medium, diced
Lemon -1 zested and juiced
Olive oil - 2 tbsp
Chopped flat leaf parsley - 1/4 cup
Chopped mint - 1/4 cup
chilly flakes to taste (optional)
Salt and pepper to taste
Water - 3/4 cup
Method:
Prepare couscous as per directions in the box. Combine water, lemon zest, 1 tbsp olive oil (I sometimes use chili oil) and chili flakes (yes!!! we love the heat) and bring to a boil. Simmer, pour over couscous, season with salt and pepper to taste, mix well, cover with a plastic wrap and set aside.
In a separate bowl, combine black beans, pomegranates, red bell pepper, lemon juice, remaining olive oil, parsley and mint. Season with salt and pepper to taste and let it stand for 30 minutes. Combine with couscous preparation and cool in the refrigerator before serving.
This was our salad during the POM dinner party I recently hosted. Check out the recap here.
Couscous is quite a newcomer to my kitchen. About a year ago, I saw Sandra Lee from the Food Network, using it. I searched online and found that couscous is a type of Middle Eastern pasta made from semolina flour. Traditionally, it is cooked by steaming for a long time. Today, the varieties sold in the grocery stores are pre-steamed for convenience and are ready in 10 minutes. Even though, it is a pasta, it neither looks nor tastes like one, but more like cracked wheat. It is very versatile and is an interesting alternative to regular pasta. I have always been using Trader Joe's whole wheat couscous in my preparations.
This is an adaptation from couscous salad recipe posted in about.com
Ingredients:
Dry Couscous - 1 cup
Black beans - 1 16 oz can, drained
Pomegranate - 1 cup
Red bell pepper - 1 medium, diced
Lemon -1 zested and juiced
Olive oil - 2 tbsp
Chopped flat leaf parsley - 1/4 cup
Chopped mint - 1/4 cup
chilly flakes to taste (optional)
Salt and pepper to taste
Water - 3/4 cup
Method:
Prepare couscous as per directions in the box. Combine water, lemon zest, 1 tbsp olive oil (I sometimes use chili oil) and chili flakes (yes!!! we love the heat) and bring to a boil. Simmer, pour over couscous, season with salt and pepper to taste, mix well, cover with a plastic wrap and set aside.
In a separate bowl, combine black beans, pomegranates, red bell pepper, lemon juice, remaining olive oil, parsley and mint. Season with salt and pepper to taste and let it stand for 30 minutes. Combine with couscous preparation and cool in the refrigerator before serving.
This was our salad during the POM dinner party I recently hosted. Check out the recap here.
Labels:
black beans,
cooking,
couscous,
mint,
parsley,
POM dinner party,
Pomegranate,
recipe,
salad
Bhel puri with pomegranates
Bhel puri may be called the king of all chaats. Chaat is small plate of savory snack, usually associated with street-side vendors. But these days they are served even in five star restaurants. Bhel puri and Pani puri are the two most popular chaats and they are soooo yummy!!
The first time I ever tried bhel puri (any chaat, for that matter) was when I was in my first year of college (yes!! you read it right). My friend Tasneem took me to 'Gangotri', the chaat and sweet shop in Chennai. I enjoyed it a lot and started trying different varieties of chaat at every opportunity I got and loved every one of them, especially the ones with yogurt.
Bhel puri is a mixture of puffed rice (bhel), cooked potato cubes, sev (fried and crumbled besan noodles), papdi (fried flat savory snack made from all purpose flour) and an assortment of vegetables. Adding pomegranates was my idea and is not part of a typical bhel puri. I also replaced the sweet chutney (Tamarind-Date chutney) with my own pomegranate chutney.
Lets gather the ingredients.
Puffed rice - 4 cups
Thin sev - 1 cup (to mix in and garnish)
Potato - 1 large, steamed and cubed
Pomegranate arils - 1 cup (to mix in and garnish)
Papdi - about 10 - 12 pieces
Tomato - 1 medium, finely chopped
Red onion - 1, finely chopped
Carrot - 1, grated
Cilantro - 1/4 cup, finely chopped
Green chillies - 3 finely chopped (or to taste)
Freshly squeezed lime juice - few drops
Cumin powder - 1/4 tsp
Coriander powder - 1/4 tsp
Chili powder - 1/4 tsp
Chat masala - 1/2 tsp (optional)
Turmeric powder - 1/4 tsp
Green chutney - 2 tbsp (ground cilantro, mint, ginger, green chillies and lemon juice)
Pomegranate chutney - 2 tbsp
Salt to taste
All the above ingredients are available in Indian stores (of course, except the pomegranate chutney)
Method:
Mix puffed rice and thin sev in a large bowl and set aside (dry). Add rest of the ingredients into another bowl and toss thoroughly (wet). When it is time to serve, add the wet mixture to the dry mixture and mix well. Garnish with more sev and pomegranate arils. Serve immediately, or it will get soggy.
This was our starter /snack during the POM dinner party I recently hosted. Check out the recap here.
The first time I ever tried bhel puri (any chaat, for that matter) was when I was in my first year of college (yes!! you read it right). My friend Tasneem took me to 'Gangotri', the chaat and sweet shop in Chennai. I enjoyed it a lot and started trying different varieties of chaat at every opportunity I got and loved every one of them, especially the ones with yogurt.
Bhel puri is a mixture of puffed rice (bhel), cooked potato cubes, sev (fried and crumbled besan noodles), papdi (fried flat savory snack made from all purpose flour) and an assortment of vegetables. Adding pomegranates was my idea and is not part of a typical bhel puri. I also replaced the sweet chutney (Tamarind-Date chutney) with my own pomegranate chutney.
Lets gather the ingredients.
Puffed rice - 4 cups
Thin sev - 1 cup (to mix in and garnish)
Potato - 1 large, steamed and cubed
Pomegranate arils - 1 cup (to mix in and garnish)
Papdi - about 10 - 12 pieces
Tomato - 1 medium, finely chopped
Red onion - 1, finely chopped
Carrot - 1, grated
Cilantro - 1/4 cup, finely chopped
Green chillies - 3 finely chopped (or to taste)
Freshly squeezed lime juice - few drops
Cumin powder - 1/4 tsp
Coriander powder - 1/4 tsp
Chili powder - 1/4 tsp
Chat masala - 1/2 tsp (optional)
Turmeric powder - 1/4 tsp
Green chutney - 2 tbsp (ground cilantro, mint, ginger, green chillies and lemon juice)
Pomegranate chutney - 2 tbsp
Salt to taste
All the above ingredients are available in Indian stores (of course, except the pomegranate chutney)
Method:
Mix puffed rice and thin sev in a large bowl and set aside (dry). Add rest of the ingredients into another bowl and toss thoroughly (wet). When it is time to serve, add the wet mixture to the dry mixture and mix well. Garnish with more sev and pomegranate arils. Serve immediately, or it will get soggy.
This was our starter /snack during the POM dinner party I recently hosted. Check out the recap here.
Labels:
Bhel puri,
cooking,
POM dinner party,
Pomegranate,
recipe
Saturday, November 13, 2010
Rasmalai - A Indian classic
Rasmalai is my favourite sweet among the whole line up of Bengali / Odiyan sweets. Bengal and Orissa are eastern states of India along the Bay of Bengal. Rasmalai is sweetened (and generally flattened) paneer balls soaked in sweetened and reduced milk flavoured with saffron and cardamom.
Recently, I heard some interesting history about these paneer sweets from Murali's manager, Sarkar. He said, rasgulla (rasmalai's cousin soaked in sugar syrup instead of milk) was invented by Nobin Das, who was a confectioner in Kolkata when a ball of paneer accidentally fell into boiling sugar syrup. I was doing some research and found that there is no agreement whether the sweet originated in Bengal or Orissa. Read more about it here. Whoever invented it, they did a great job having brought to the world such an amazing sweet.
My first experience (that I remember) of rasmalai is in Chennai, when my maternal uncle would bring the sweet home from the famous sweet shop 'Shree Mithai'. Ever since, their rasmalai has become my favourite. Once, when I was in school, my mom and I tried to make rasgulla and did not turn out good. After that, I never tried to make this sweet at home until I found an easy recipe online in Priya's kitchen to make them from ricotta cheese. There were so many reviews from people who followed the recipe and it turned out great. I tried it last Diwali and somehow managed to goof it up... I decided to try the original long version recipe next time, which I did this Diwali.
I followed the recipe from showmethecurry.com. I replaced lemon with yogurt to curdle the milk while making paneer. Also, I did not thicken the ras (milk) as much as they did. I am repeating the same recipe from 'Show me the Curry', modifying the steps that I did differently, adding my tips if I have any, and adding step by step pictures where ever I can.
Ingredients:
For paneer balls:
Whole Milk – 5 cups
Yogurt - 1 cup
Water – 5 cups (in a pressure cooker)
Sugar – 1 cup
For ras (milk):
Whole Milk – 3 cups
Saffron – pinch
Cardamom Powder – 1/4 tsp
Pistachios & Almonds – 2 Tbsp, roughly chopped
Sugar for the Ras – to taste
Method:
Boil 5 cups of milk.
Set up a cheese cloth over a colander in the kitchen sink.
When the milk comes to a rolling boil, add the yogurt.
The milk should start to curdle. If you do not see enough curdling after about 10-15 seconds, add a drop or 2 of lemon juice.
Remove from heat and pour the contents over the cheese cloth. Be careful, the contents are very hot.
Gather the cheese cloth into a ball and hang it from the kitchen sink tap to drain all whey water. Leave it up to 30 minutes to 1 hour.
Meanwhile, heat 3 cups of milk (for ras) in a non-stick vessel. When milk starts to foam up, add saffron and sugar to taste. Mix well and let the milk simmer until it reaches required consistency. I let it reduce to 3/4ths of its original volume. Add cardamom and the nuts and keep aside. I could not find raw pistachios in any store - looks like some quality control issues and no store carries it currently in US. I used only almond pieces.
When the hanging paneer has cooled enough to touch, squeeze out as much whey water as possible and remove from cheese cloth.
Break paneer and knead until it becomes smooth and fluffy. Using a food processor makes the process easy and quick. I do not own a food processor, hence used my blender. Make sure the container and the blades are completely dry - else, paneer would get sticky.
Roll the kneaded paneer into small balls and flatten them. These balls would become 2-3 times their original size, so keep them small.
In a pressure cooker with water, add the sugar and the paneer balls. Cook the paneer balls in the pressure cooker with weight until one whistle sounds. Remove from heat and set the timer for 5 minutes. After exactly 5 minutes, release the pressure by placing the pressure cooker under running water in the kitchen sink.
Open the pressure cooker. Remove the paneer balls onto a plate using a slotted spoon and let it cool. When they have cooled enough to touch, squeeze the water out of each one and drop them gently one by one in the prepared milk to make super duper rasmalai. (If dropped into sugar syrup, it becomes rasgulla!!! - two recipes in one post!!)
Cool in the refrigerator and let it soak the sweet flavoured milk. To serve, transfer couple of malai balls to a serving plate, add some ras (milk), garnish with saffron and almonds and enjoy every bite.
Recently, I heard some interesting history about these paneer sweets from Murali's manager, Sarkar. He said, rasgulla (rasmalai's cousin soaked in sugar syrup instead of milk) was invented by Nobin Das, who was a confectioner in Kolkata when a ball of paneer accidentally fell into boiling sugar syrup. I was doing some research and found that there is no agreement whether the sweet originated in Bengal or Orissa. Read more about it here. Whoever invented it, they did a great job having brought to the world such an amazing sweet.
My first experience (that I remember) of rasmalai is in Chennai, when my maternal uncle would bring the sweet home from the famous sweet shop 'Shree Mithai'. Ever since, their rasmalai has become my favourite. Once, when I was in school, my mom and I tried to make rasgulla and did not turn out good. After that, I never tried to make this sweet at home until I found an easy recipe online in Priya's kitchen to make them from ricotta cheese. There were so many reviews from people who followed the recipe and it turned out great. I tried it last Diwali and somehow managed to goof it up... I decided to try the original long version recipe next time, which I did this Diwali.
I followed the recipe from showmethecurry.com. I replaced lemon with yogurt to curdle the milk while making paneer. Also, I did not thicken the ras (milk) as much as they did. I am repeating the same recipe from 'Show me the Curry', modifying the steps that I did differently, adding my tips if I have any, and adding step by step pictures where ever I can.
Ingredients:
For paneer balls:
Whole Milk – 5 cups
Yogurt - 1 cup
Water – 5 cups (in a pressure cooker)
Sugar – 1 cup
For ras (milk):
Whole Milk – 3 cups
Saffron – pinch
Cardamom Powder – 1/4 tsp
Pistachios & Almonds – 2 Tbsp, roughly chopped
Sugar for the Ras – to taste
Method:
Boil 5 cups of milk.
Set up a cheese cloth over a colander in the kitchen sink.
When the milk comes to a rolling boil, add the yogurt.
The milk should start to curdle. If you do not see enough curdling after about 10-15 seconds, add a drop or 2 of lemon juice.
Remove from heat and pour the contents over the cheese cloth. Be careful, the contents are very hot.
Gather the cheese cloth into a ball and hang it from the kitchen sink tap to drain all whey water. Leave it up to 30 minutes to 1 hour.
Meanwhile, heat 3 cups of milk (for ras) in a non-stick vessel. When milk starts to foam up, add saffron and sugar to taste. Mix well and let the milk simmer until it reaches required consistency. I let it reduce to 3/4ths of its original volume. Add cardamom and the nuts and keep aside. I could not find raw pistachios in any store - looks like some quality control issues and no store carries it currently in US. I used only almond pieces.
When the hanging paneer has cooled enough to touch, squeeze out as much whey water as possible and remove from cheese cloth.
Break paneer and knead until it becomes smooth and fluffy. Using a food processor makes the process easy and quick. I do not own a food processor, hence used my blender. Make sure the container and the blades are completely dry - else, paneer would get sticky.
Roll the kneaded paneer into small balls and flatten them. These balls would become 2-3 times their original size, so keep them small.
In a pressure cooker with water, add the sugar and the paneer balls. Cook the paneer balls in the pressure cooker with weight until one whistle sounds. Remove from heat and set the timer for 5 minutes. After exactly 5 minutes, release the pressure by placing the pressure cooker under running water in the kitchen sink.
Open the pressure cooker. Remove the paneer balls onto a plate using a slotted spoon and let it cool. When they have cooled enough to touch, squeeze the water out of each one and drop them gently one by one in the prepared milk to make super duper rasmalai. (If dropped into sugar syrup, it becomes rasgulla!!! - two recipes in one post!!)
Cool in the refrigerator and let it soak the sweet flavoured milk. To serve, transfer couple of malai balls to a serving plate, add some ras (milk), garnish with saffron and almonds and enjoy every bite.
Labels:
Bengali sweet,
cooking,
dessert,
Indian sweet,
paneer,
rasgulla,
rasmalai,
recipe
Thursday, October 28, 2010
Ragda Patties - A Mumbai street snack
My husband (M) was born and lived his childhood days in Mumbai. He has some wonderful memories of food, from there. Few of them are kulfi from the street cart vendor, pani puri, gola ice (the Indian popsicle which is a cross between granita and popsicle) and ofcourse, Ragda patties. I have never tried it in India, but have tried in a few Indian restaurants here in California. According to M, none of it tastes as good as what he had in Mumbai as a kid. I thought, 'May be we should try it at home sometime'.I am a big time planner. I plan my menu for the next week by Friday, make a list based on that menu and then shop for groceries. This way, I don't shop a lot (which I tend to) and by end of the week my refrigerator is almost empty and ready for re-stocking. One day, while planning the week's menu, I remembered ragda patties and asked M if he would help me make it that Sunday. He agreed and I shopped for the ingredients. This dish comes in two parts - 'Ragda', which is cooked dried peas (white or green) with onions, tomatoes and spices, while 'patties' is a plain old potato patty. Instead of using just potatoes, I insisted on using carrots, peas, cilantro and soy granules too. We invited few friends for our Sunday chat indulgence. We had dosa, ragda patties, pani puri, spinach rice and rasgulla (brought in by Smita) and most of all had lots of fun!! We gave ourselves an hi-fi as M thought that the ragda patties tasted very close to those in his memories. One more thing to add here is, this is the first good food picture I have shot indoors under artificial lights with my point and shoot! We have recently purchased a DSLR - hoping to shoot better pictures soon.
Recipe for ragda:
- Soak dried peas (I chose white) for 4-6 hours. Cook it with water and turmeric powder until soft, preferably in a pressure cooker.
- In a saucepan add 2-3 tsp of oil. Saute finely chopped onions, ginger paste, garlic paste and finely chopped tomatoes. Add the cooked peas, salt to taste, red chilly powder, garam masala powder and required amount of water, cover and bring to boil. Then simmer for 5 minutes.
- Steam potatoes, peel and mash them. Add salt and red chilly powder to taste and mix well.
- Prepare soy granules (I like granules to chunks as they are smaller in size and blend in better) as directed in box.
- Grate carrots, thaw/ drain peas, if using frozen/ canned, finely chop onions and cilantro
- Heat 1 tbsp of oil in a sauce pan, saute onions, carrots and peas. Add salt and red chilly powder to taste and mix well. Add very little water and cook covered for a minute. Heat until all water evaporates and the mixture is dry. Add potatoes, soy granules and cilantro and mix well.
- Make patties, roll over bread crumbs and pan fry in a non-stick pan.
Serve patties and ragda separately. Additionally serve finely chopped onions, grated carrots, finely chopped cilantro and lemon wedges for garnishing. Green (mint - cilantro) chutney and sweet (tamarind - date) chutney always accompany any Indian chat.
To assemble, place 1 0r 2 patties on a place, smash them slightly with a spoon, add ragda on top, add your choice of chutneys, then top off with your favourite garnishes and enjoy!!
Labels:
cooking,
dried peas,
potato,
Ragda patties,
recipe
Monday, December 21, 2009
Mirchi ka salan
The first time I had 'Mirchi ka Salan' was at a restaurant near my office in Chennai with friends and absolutely loved it. I ordered it again the next time I went there. One day, my colleague in the US, Latha, brought it for lunch and I thought I'll make it at home, but that did not happen. I am in Chennai now at my mom's place. My mom had bell peppers which she wanted to cook the same day. She was going to cook drumstick leaves and she said she is going to add bell peppers to that. I love bell peppers and felt it would be a weird combination with drumstick leaves. So, I told her I'll make something with the bell peppers and the first thing that came to my mind was 'Mirchi ka salan'.Mirchi ka salan is a Hyderabadi side dish that is served with rice and biriyani. It is prepared with mild varieties of peppers like Anaheim, Poblano, bell peppers, banana peppers and sometimes Jalapenos. In Chennai, it is generally prepared with 'Bajji molagai'. The original recipe uses a flat-bottomed copper vessel and is covered with dough while cooking over low heat to enrich the flavours. The roasted and ground spices makes it so aromatic and it has a wonderful nutty flavour from sesame seeds and peanuts.
Ingredients:
Bell peppers - 1 lb cut into large cubes
Oil as required
Salt to taste
Turmeric powder - 1/4 tsp
Curry leaves - few
Mustard seeds - 1 tsp
Juice of a small (1/2 lime sized) piece of tamarid
To grind set 1:
Onion - 1 large diced
Tomato - 1 large diced
Ginger - 1 inch piece
Garlic - 4-5 cloves
To grind set 2:
Cumin seeds - 1/2 tsp
Coriander seeds - 1 tsp
Red Chilies (whole) - 5 - 6 or to taste
Sesame seeds - 1 tsp
Peanuts - 2 tbsp
Method:
Dry roast cumin, coriander and sesame seeds separately and grind all set 2 ingredients together. In little oil saute cubed bell peppers until slightly wilted, remove and set aside. In the same vessel heat some more oil and fry ginger, garlic, onion and tomato. Cool, grind and set aside. Heat little oil, add curry leaves and once the spluttering stops, add mustard seeds and allow it to crackle. Lower the heat and then add ground set1 paste and mix well. Next, add ground set2 powder, salt, turmeric powder and tamarind juice, mix well and bring it to boil. Now add the sauteed bell peppers and allow to boil for 30 seconds, remove from heat and enjoy hot with rice.
Thursday, December 3, 2009
Paneer Burji
We are in India right now and the first three weeks have been very busy with festivities. We have gotten out of jet lag, finished my dad's 60th birthday at Thirukadayur, went to Thirupathi, celebrated Karthigai deepam and have finally settled down. I have some breathing room before the preparations for my bil's wedding would start and decided to utilize that in my blog.Paneer Burji is a very simple and easy dish and can be served as a side dish with roti or separately as a breakfast entree. It is very nutritious and high in protein. 'Pal curry' (Curried milk), as my mom would call it, is made when she has excess milk or when she suspected the milk would turn sour soon. She would boil the milk, curdle it using lemon juice or curd, separate out the curds from whey water by filtering through a 'veshti' (dhoti) cloth and hang it to drain the excess water. Then she would crumble the paneer with her fingers and use it in the curry. As a kid, I somehow never liked this dish and that thought stayed in my head. When I prepared it at home for the first time, I was apprehensive about the taste. I took the first spoon expecting it to taste bad. I was surprised by how much I liked it. I realized that our tastes grow with us and our horizons widen each day.
My version here uses store bought paneer for ease, and can be substituted with home-made paneer. I made this recently as a side dish when we had invited a couple of Murali's (husband) colleagues home, for dinner. We loved it so much that the four of us finished all the burji made from about a pound of paneer (apart from the other dishes). My little son liked it too - which was an additional plus.
Ingredients:
Paneer - 400 gms pack grated
Onion - 2 finely chopped
Tomato - 3 finely chopped
Green chillies - 4-5 or to taste
Ginger paste - 1 tsp
Garlic paste - 1 tsp
Cumin seeds - 1 tsp
Garam masala powder - 1 tsp
Turmeric powder - 1/4 tsp
Cilantro - 2 tbsp finely chopped (optional)
Oil - 2 tsp
Salt - to taste
Method:
Heat oil over medium heat, add cumin seeds and fry until brown. Add onion and green chillies and fry for a minute. You can add little salt at this stage to bring out the sweetness of onion. Now add ginger paste and garlic paste and fry until the mixture turns light brown. Keep stirring to avoid burning. Now add tomatoes and fry for 2 minutes. Add salt (include salt for paneer too), garam masala powder, turmeric powder and add little water and cook covered for 5 minutes. Now add the grated paneer and mix well until heated through. Add cilantro mix well, remove from heat and enjoy hot.
Monday, November 2, 2009
Beans paruppu usili - Green beans with lentils
Paruppu usili can be made with green beans, gover beans or banana flower. It is a traditional side dish and tastes wonderful with rice and rasam or mor kozhambu. I love paruppu usili, but do not make it very often as it takes a bit of effort. This time, I served it with mor kozhambu, we all loved it and I felt, it was the best paruppu usili ever.There are two basic variations in cooking the dal (lentils).
1. Soak, grind and saute
2. Soak grind, steam and saute
Steaming before sauteing makes the usili taste better and consumes less oil (and of course takes longer to prepare)
Ingredients:
Green beans - 1 pound cleaned and cut into about 1 inch long pieces
Toor dal - 3/4 cup
Channa dal - 3/4 cup
Toor dal - Channa dal proportion can be varied slightly based on the final texture you would like to achieve. Toor dal makes it softer and channa dal makes it crispier.
Oil - 2 tsp
Asafoetida (hing) - 2 pinches
Curry leaves - 6-8
Red chillies broken into pieces - 4-6 or to taste
Mustard seeds - 1 tsp
Urad dal - 1 tsp
Ginger paste - 1 tsp
Method:
Soak toor dal, channa dal and 3-4 red chillies in water for 2-3 hours (not longer). Grind into a coarse paste. Place dal balls on oiled idly plates and steam for 10 - 15 minutes. Cool, remove from idly plates and break into very small pieces using your fingers. Cook the beans in microwave oven with water sprinkled on, until 3/4 cooked. Heat oil in a pan, add asafoetida and curry leaves and fry until the spluttering stops. Add mustard seeds and when they start crackling, add the remaining red chillies and urad dal. Fry until urad dal turns golden brown. Add ginger paste and fry for about 30 seconds. Now add the steamed dal and cooked beans and mix well. Fry on medium-low heat until dry and desired crispness is reached. This may take about 20 - 30 minutes of patient stirring. Then, enjoy the reward of your patience :)
Labels:
beans paruppu usili,
channa dal,
cooking,
green beans,
paruppu usili,
recipe,
red gram
Tuesday, October 27, 2009
Asparagus in orange vinaigrette
Asparagus is one of our favourite vegetables. It has a unique crisp wonderful flavor to it. I have used canned and frozen ones couple of times, but never bought the fresh ones. My husband wanted to buy them many times and I said no because they were a bit expensive. Finally, last week we decided to bring home the fresh ones and I made this quick, easy and yummy recipe.Ingredients:
Asparagus stalks - 2 pounds washed and trimmed
Chopped raw unsalted nuts like almonds, hazelnuts, cashews, walnuts, pecans, sunflower seeds - 3 tbsp ( I had only cashews and sunflower seeds at home)
For Vinaigrette:
Extra virgin olive oil - 2 tbsp
Orange Zest - 1/4 tsp
Freshly squeezed orange juice - 3 tsp
Freshly squeezed lemon juice - 1 tsp
Salt to taste
Coarsely ground pepper to taste
Method:
Whisk together all the ingredients for vinaigrette, cover with a plastic wrap and refrigerate for about an hour.
Dry toast the nuts in a pan on stove top or in oven until golden brown and crisp. Boil water with salt, add asparagus stalks and simmer for about 3-4 minutes. Do not over cook. Drain using a colander and shock with cold water. Transfer to a serving tray, pour the vinaigrette and sprinkle nuts on top. Simple, healthy and yummy.
Labels:
Asparagus,
cooking,
orange vinaigrette,
recipe,
salad
Spiced and baked Sweet potato wedges
Eating sweet potatoes is a better way to get your starch. It is abundant in Vitamins A, high in fiber and low in fat. I buy sweet potato for my son in 3 pound bags and end up using just 1 or 2 a month for him. The rest, I try to cook up for us in different ways. Sweet potato wedges is one of my favourite and after few trials and errors, I have perfected this recipe which we all (including my son) loves.Ingredients:
Sweet potatoes - about 4 medium sized, peeled and cut. I cut into 1/4 inch wedges to entice my son. Cubes or just rounds would work too.
For Marinade:
Olive oil - 1 1/2 tsp
Grated onion - 2 tbsp
Ginger paste - 1/2 tsp
Garlic paste - 1/2 tsp
Red chilli powder - 1/4 tsp or to taste
Salt - 3/4 tsp or to taste
Sugar - 1/2 tsp to help in browning
Italian seasoning - 1/2 tsp - optional(You can use dried oregano, rosemary, basil or thyme)
Now, the secret ingredient, Soy sauce - 2 tsp
Method:
Mix all the marinade ingredients and transfer into a quart size zip-top bag. Add the cut sweet potatoes, close the bag and mix well to coat. Let it sit for 1/2 to 1 hour.
Preheat the oven to 400F. Coat a baking pan with cooking spray. Transfer the contents of the zip-top bag into the pan. Arrange the pieces into a single layer. Bake for about 20 minutes. Stir and bake for another 20 minutes (Oven time varies based on the size of the pieces). Then broil for about a minute and enjoy. Sweet potato wedges do not get crispy like potatoes wedges. They are a little soft, chewy and yummy of course!!!
Sunday, October 25, 2009
Paneer and Vegetable Tikka - using the oven
This is my husband's recipe and when he made it the first time, I took a bite and felt all the wonderful flavours explode in my mouth. I just closed my eyes and cherished it, like Remy the rat in the movie 'Ratatouille' (one of my favourite animated movies). This is a simple and easy recipe, but takes time, as paneer and vegetables need to be marinated at least for 6 hours before baking in the oven. Your patience will be rewarded.
Ingredients:
Paneer - 400 grams (about 14 oz) cut into cubes
Colourful bell peppers - 2 - 3 cut into big pieces
Onion - 1 cut into big pieces
Cauliflower - 8 -10 florets
You can use other 'grillable' veggies and fruits of your choice
Bamboo skewers - 15-20
For marinade:
32 oz cup of Yogurt (I used fat free) - 1
Cumin powder - 1 1/2 tsp
Coriander powder - 1/2 tsp
Red chilli powder - 1 tsp
Bay leaf - 1
Cloves - 5
Turmeric powder - 1/4 tsp
Ginger paste - 3 tsp
Garlic paste - 3 tsp
Salt - 1 tsp
Juice of 1 lemon
Method:
Mix all the ingredients for the marinade. Add cubed paneer and vegetables, toss well with hands to coat each piece, cover and refrigerate for 6 - 12 hours, mixing every 2-3 hours (you can skip the mixes when left overnight ;-) Mix before going to bed and then in the morning).
Preheat oven to 425F. Soak the bamboo skewers in water for few minutes. Skewer paneer and each of the vegetables in separate sets of skewers, as the grilling time is different for each one. Place the skewers supported by the edges of a baking pan to collect the dripping marinade. Make sure paneer and veggies do not touch the bottom of the pan. Bake until the edges turn brown. It takes about 20 minutes for paneer, 30 minutes for bell pepper and cucumber and 45 minutes for onions, cauliflower and pineapple. Once done, remove from skewers and enjoy when hot as an appetizer with green and sweet chutneys or as a side for roti. Optionally, you can toss with chat masala, coriander leaves (cilantro) and lemon juice before serving.
Labels:
cooking,
paneer,
paneer tikka,
recipe,
tikka,
vegetables
Wednesday, October 21, 2009
Braised red cabbage and apple (Rotkraut)
Ingredients:
Shredded red cabbage - about 5 cups
Tart apple - 1 cored and sliced (I used Grammy Smith - since the skin is thicker, I peeled it)
Onion - 1 small chopped lengthwise
Butter / oil / margarine - 1 tbsp
Caraway seeds - 1 tsp (try to get caraway, otherwise substitute with 1/2 tsp of cumin seeds)
Sugar - 1 1/2 tbsp (Brown sugar preferred)
Salt to taste
Ground black pepper to taste
Apple cider vinegar - 1 tbsp
Method:
Heat butter (or any fat that you are using) in a pan. Add caraway seeds and fry for few seconds. Add onion and fry until transparent. You can add a little salt at this time to bring out the sweetness of the onion. Add cabbage and fry until it is slightly wilted. Now add apple slices and mix well. Add salt to taste and few tablespoons of water and cook covered on low heat for about 15 - 20 minutes. Stir occasionally to make sure it does not burn. Now add sugar, vinegar and ground pepper, mix well and cook for another 3 minutes. Remove from heat and serve.
This dish tasted very different from most dishes I have ever tasted. It had an interesting sweet, sour and salty taste to it. My 18 month old son loved it the night I made it and ate more than he would generally. But when I gave him the little bit I saved for him the next day, he refused to even try it and looked at me like "what the heck or you trying to feed me?" I am still wondering what made him like it so much the first night and not the next morning!!
Wednesday, October 14, 2009
Murukku with my evening tea
I am a coffee lover and always start my day with fresh filter coffee my husband makes every morning. Very rarely on cold winter evenings, I make myself a cup of hot tea and relax with some munchies. This time it is some home-made 'Mullu Murukku'. Murukku is a traditional south Indian snack and is made back home during almost every festival. It is not very difficult to make, as many people think. You need a 'murukku press', which is a mold to press out the dough into the shape as in the picture. I got my press from India, it may be available in Indian stores too.This is how I (or my mom and grandma) prepared it.
Uncooked raw rice - 2 1/2 cups
Lightly roasted, ground and sieved urad dal - 1/4 cup
Ground and sieved dalia (pottu kadalai) - 1/4 cup
Butter - 25 grams (about 2 1/2 tbsp) Butter makes the murukku softer. You can use less, then it may end up a little hard to bite into.
Sesame seeds - 1 tsp (optional)
Salt to taste
Chilli powder - 1/2 tsp (optional)
Oil for deep frying
Murukku tastes best if made from home-prepared rice flour. But if you are pressed for time, or just not in the mood, you can use store bought rice flour (which I do once in a while).
To prepare rice flour, wash and soak uncooked raw rice for about 2-3 hours in water. Drain all the water and spread the rice over a clean towel and let it dry. When the rice is about 3/4th dried, powder it very fine. In India, we would take it to a mill for powdering. But, here in the US, I just used my dry grind attachment in my blender. Cool and then sieve the flour through a fine sieve. It can be stored in an airtight container for about a week. This preparation is common for all the traditional fried snacks that use rice flour.
Dry roast the rice flour lightly over low heat. If over roasted, the murukku will turn out darker and would not look very appetizing. In a large bowl, mix the rice flour, butter and all the other dry ingredients with water to make a stiff dough. This would require about 1 1/2 to 2 cups of water. If you add more water, the murukku will end up being oily.
Heat oil for deep frying in a pan. Oil a plastic bag (like ziplock - In India, we would use banana leaf). Using the murukku press, make spiral shape on the plastic bag. When the oil is hot enough, flip the shaped dough from the plastic bag into your palm and drop it in the oil. Fry until the sizzle subsides and murukku turns golden brown. Remove using a slotted spoon and drain on a paper towel. Cool and store in an airtight container. Enjoy whenever you want for the next 15 - 20 days (if it stays that long).
This post is my entry to 'Monthly Mingle' hosted by 'My Diverse Kitchen' under the theme 'High Tea Treats'.
Labels:
cooking,
High Tea Treats,
Monthly mingle,
murukku,
recipe,
snack
Monday, October 12, 2009
Carrot Halwa
Ingredients:
Carrots - about 2 pounds grated
Ghee - 3 tbsp
Cardamom powder - 1/4 tsp
Saffron - few strands (optional)
Milk - 1 1/2 cups
Sugar - 3/4 to 1 cup (based on your sweet tooth)
Raisins - as required
Cashews - as required
Heat ghee in a heavy bottomed deep pan. Fry the cashews until golden brown. Remove using a slotted spoon and set aside. Next, fry raisins until they bloat up like balloons. Remove using a slotted spoon and set aside. In the remaining ghee fry the grated carrots on low heat until the raw smell is gone. You can add little more ghee if required. Keep stirring to avoid burning. Add sugar and mix well. Once the sugar is melted, add milk, cardamom powder and saffron and cook covered in low heat for about 15 minutes, stirring occasionally. Remove cover and keep stirring until all the milk is evaporated. Remove from heat and garnish with raisins and cashews... Serve hot or chilled or at room temperature. Hmmm.... Yumm!!! Warm carrot halwa with ice cream (strawberry or vanilla) is one of my favourite desserts...
Labels:
carrot,
carrot halwa,
cooking,
dessert,
gajar ka halwa,
halwa,
recipe,
sweet
Friday, October 9, 2009
Cucumber and Cauliflower cooked in Coconut milk
Ingredients:
Medium cucumbers - 2 - Peeled and chopped into 1 inch pieces
Cauliflower florets - 2 cups (cut into bite sized florets)
Coconut - 2 cups grated (or equivalent pieces)
Cumin seeds - 2 tsp (1 tsp for grinding and 1 tsp for tempering)
Coriander seeds - 1 tsp
Green chillies - 3 to 4 or to taste
Red chillies - 2 or to taste
Cinnamon - 1/2 inch piece
Curry leaves - 6-8 leaves
Juice of 1 lemon
salt - to taste
Extract coconut milk (thick and thin) with 1 tsp of cumin seeds, coriander seeds, green chillies, red chillies and cinnamon. To do this, grind all the above mentioned ingredients in a blender with 2-3 cups of warm water. Using a strainer, squeeze out all the liquid, reserve the residue and set aside. This makes the first or the thick milk. Grind the residue in the blender again with 1 1/2 - 2 cups of warm water and squeeze out the thin or the second milk. Discard the residue now.
Boil the cucumbers and cauliflowers with the thin coconut milk until cooked. Now add salt and the thick coconut milk and remove from heat. Add the juice of 1 lemon and mix well. In a separate small pan heat oil, fry curry leaves and remaining cumin seeds and add to the cooked vegetable. Enjoy hot with plain or jeera rice.
Raveela told me that the same preparation can be done with cabbage, bottle gourd (loki), white pumpkin, cucumber and cauliflower - solo or mix n match.
Labels:
cauliflower,
coconut,
coconut milk,
cooking,
cucumber,
recipe,
side dish,
vegetable
Wednesday, October 7, 2009
Hara Bhara Moong (Green gram beans)
In little oil, I sauteed few green chillies, chopped ginger, few garlic cloves, one bunch of coarsely chopped cilantro and one cup mint leaves. I ground them into a paste with 4 tbsp of grated coconut and set aside.
I sauteed finely chopped onion, tomato and diced red bell peppers. Then I added the moong beans sundal (can be substituted with cooked moong beans), salt and little water and brought the mixture to boil. Then I added the ground paste mixed well and removed from heat. It turned out really good. After dinner, I ended up eating the remaining with plain yogurt.... Hmmm... wonderful!!
Labels:
cooking,
coriander,
mint,
Moong beans,
moong dal,
pacha payaru,
recipe
Sunday, October 4, 2009
Vazhaipoo poriyal - Banana flower with spices
I do not cook vazhaipoo (banana flower) very often because, cleaning it takes quite a bit of time. Each flower has a hard stalk like thing (style and stigma) in the center which remains membranous even after cooking and hence has to be removed. As we move towards the center of the inflorescence, the flowers become smaller and just snipping off the top of each flower would do. At one point, it becomes impossible to remove any more bracts, then, the whole remaining inflorescence may be cut into small pieces. The flowers that were removed and cleaned need to be finely chopped. Cleaning vazhaipoo stains your hands (and clothes on contact), so make sure you apply oil to hands before you start. Vazhaipoo has a mild bitter (yummy) flavour and you can add some sugar or jaggery to mask the bitterness, I never do it though.
Cleaned and chopped banana flower - 1
One hand full moong dal - soaked in water for about 2-3 hours
Onion - 1 small - finely chopped
turmeric powder - 1/4 tsp
Grated coconut - about 2 tbsp
Mustard seeds - 1/2 tsp
Cumin seeds - 1/2 tsp
Hing - 2-3 pinches
Curry leaves - 6-7
Red chillies - 3 -4 broken into half
Urad dal - 1 tsp
salt to taste
Mix turmeric and salt into cleaned and chopped banana flower and set aside for about 30 - 60 minutes. This step can be skipped if you don't have as much time, add salt and turmeric while cooking.
Heat 2-3 tsp of oil in a saute pan over medium heat. When oil is hot, add hing and curry leaves and fry for few seconds. Add mustard seeds and cumin seeds. When mustard seeds start to crackle, add red chillies and urad dal and fry until urad dal turns golden brown. Now add chopped onion and mix to coat with oil. At this point little salt can be added to bring out the sweetness of the onion. Fry until onion is transparent. Now add the marinated banana flower and soaked moong dal. Mix well and add about 1/2 cup of water and cover to cook. When both moong dal and banana flower are cooked, add grated coconut mix well, remove from heat and serve.
This time, my vazhaipoo poriyal turned out really yummy, I think the vazhaipoo was very fresh...
Subscribe to:
Posts (Atom)